• Real Estate Photography, Videos, Tours, Printing & Design - Toronto, GTA & Surrounding Areas

Real Estate Info

Getting home reno supplies on a budget

600 401 Nisha Muire
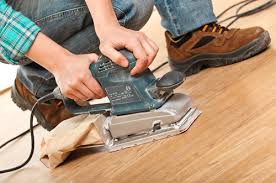
Renovating your Toronto home doesn’t have to break your bank. With a few shrewd tips, you can get excellent quality materials at competitive prices that will slash your budget significantly. We are not saying that you have to skimp on quality and finishes, we’re just suggesting that there are ways of getting what you want at the price you want.
 
Buy ready-made
One of the best ways to save money is to buy off the shelf – especially when it comes to cabinets. Big box home renovation stores always carry ready-made cabinetry. Although the sizing might be limited, you can always make what is in-store work for you using spacers and a little imagination. It will save you more than a third of the cost of getting those same cabinets custom made or sized exactly for your project.
 
Check out the returns section
Mistakes happen and people do change their minds when it comes to colours and materials. In many instances you can find great deals in the returns section of your hardware store. Sometimes it is left-over counter pieces or tiling, other times you can find really good quality paints at a fraction of their cost simply because they have a been premixed and the colour might not be everyone’s cup of tea. Generally, if you know that you have a reno project coming up, then make it a habit to troll the hardware stores every day looking for that gem – when you find it, scoop it up and save it for when you are ready to renovate.
 
Shop, shop, shop!
Another good tip is to not discount any store selling materials – no matter how cheesy or odd it might look. The overstock and liquidation centres often hold fantastic deals that are only discovered if you go inside. Also don’t overlook places like Costco, which often has excellent fixtures and materials at very competitive prices – although it is often hit-or-miss and materials aren’t always in stock.
 
The classifieds
Looking for materials? Check out kijiji and Craig’s List for people who are selling their overstock tiles, drywall, flooring and paint – some people will even give these items away at the end of a reno if they have no place to store them.
 
It is possible to find materials for your renovation project at good prices. All you have to do is look and be patient.

Changing a light fixture

1024 576 Nisha Muire
One of the simpler DIY tasks on any home reno list is that of changing a light fixture. Although it is advisable to always consult and/or hire an electrician if your electrical system is old and not set-up in a standard fashion, most homes have light fixtures that can be switched fairly easily even by those without a lot of DIY experience.
 
1. Turn off the power
The first thing to do is turn off the circuit breaker controlling the power supply to the fixture you wish to change. Find your circuit panel and turn off the breaker. If you aren’t sure which breaker it is, keep the light on and try each breaker until the light goes off.
 
2. Remove the old fixture
When you are removing your old light fixture, be sure to take good note of how the wires have been attached. If need be, take a picture of the set-up so that you aren’t wondering afterwards which wires you should be attaching together.
 
3. Secure light box in place
Once the old fixture has been removed, be sure that the light box is securely in place so that it is easier for you to work on it – but it shouldn’t be too tight or you won’t be able to manipulate the wires.
 
4. Connect new wires
Now you are ready to connect the wires of the new fixture to the wiring in your home. If you don’t remember exactly how that should be done – consult the picture that you took of the old wiring!
 
5. Install canopy
Bend the wires into the base and then install the new fixture’s base/canopy to the light box.
 
6. Install bulbs
Install the wattage of bulb called for by the light fixture. If you use a bulb that requires too high a wattage, it will constantly burn out.
 
7. Install cover
The last step to changing your light fixture is to install the pretty part – the cover that will make all of the difference to the look of your home.

Installing a door: the basics

489 276 Nisha Muire
Installing an interior door in your Toronto home can be a bit of a challenge, but if you follow the proper steps, it is also one of those tasks that bring with it bragging rights. Yes, it can be tricky, but getting the proper level at the beginning really is the trickiest part. Once you have the proper level set, then you will have a much easier time of it. Before starting this project, however, be sure to have a package of wood shims as well as finishing nails – and, a very good level. You can check if your level is good by laying it down on a flat surface and noting the position of the bubble, then flip it over and see that the bubble returns to the exact same spot – if it doesn’t, get a new level.
 
Here are a few basic guidelines for the proper installation of an interior door:
 
Level the floor
If the floor beneath your door jamb is uneven, then your latch will not line-up and your door will not close properly. Check to make sure that your floor is not uneven. If it is then you will have to trim one of the door frame posts to compensate for it. Remember that if you have to cut more than ¼ of the frame from one side, then you may have to also trim the door itself to ensure that it closes properly.
 
Shim
Once you have the floor level, nail one shim to the inside frame to get started. Next, place your door into the frame and make sure that it is opens and closes properly. If there are any problems opening and closing the door, you will have to shim the sides to get it even. Once it has the proper movement, secure the jamb to the post by nailing along its length.
 
Check
When the door is initially secured, check the movement again and place a shim beneath each hinge to ensure the proper functioning of the door. Once all of the shims are in place, nail the jamb through the shims. Break off any protruding shims.
 
Finish
Use a nail set to push the nails beneath the surface of the wood and then fill the holes with spackle to create a smooth finish. Check the door again to make sure it opens and closes properly and make any adjustments using a sledgehammer to gently tap into place where necessary.

Floor sanding: hiring a professional vs DIY

276 183 Nisha Muire
Homeowners in Toronto with hardwood floors that need a little love have two options when it comes to restoring their flooring – either they can opt to sand and varnish their floors themselves or they can hire a professional to take care of it for them. While hiring a professional will set you back between $1.50 to $4.00 per square foot depending on the kind of finish that you want and the amount of work that will have to be put into the job. While you will certainly save significantly by doing the job yourself, you will also have to put in your time and effort to do a proper job.
 
Should you decide to do the job yourself, you will have to rent the proper equipment, be sure to have a heavy-duty vacuum on hand and understand the basics of floor sanding. Depending on the state of your flooring, you must start with the heaviest sandpaper and move to the lightest in order to get a smooth finish. You must also remember to apply an even pressure and to go with the grain of the wood to get a consistent look. Removing all of the dust prior and making sure that your floors are spotless before applying your varnish is also crucial to getting that crystal clear look and satiny finish that feels so nice underfoot.
 
Should you decide to hire professionals, there are certain questions that you should ask before signing a contract:
– What kind of experience do they have?
– How many people will b on the job?
– How long will it take for them to finish?
– Will they move your furniture and store it for you?
– How will they clean-up?
– How and when do they expect payment?
– What kind of varnish do they use?
– Do they offer staining as well as varnish?
– Ask for references!
 
Here are the pros and cons of both options:
 
DIY PROS
More affordable
Set your own schedule
 
DIY CONS
Steep learning curve if 1st time
Full liability if mistakes happen
 
PROFESSIONAL PROS
Little effort on your part
Professional results
Guaranteed by company hired
PROFESSIONAL CONS
More expensive

Getting the perfect coat of paint

1000 813 Nisha Muire
Refreshing the colour palate of your Toronto home is one of the easiest projects for a DIY enthusiast. Painting can a lot of fun and very satisfying as it is one of those projects that can totally transform your living space in very little time. Painting your home is also an inexpensive way to refresh a tired room. To get it right here are a few handy tips to follow.
 
1. Prepare your walls by repairing any major cracks and filling in holes. Be sure to sand and then prime the patched sections so that your paint job doesn’t turn out blotchy.
 
2. Lightly sand your walls to ensure better adhesion of your new paint job. Next wash your walls thoroughly and dry to get the best adhesion possible.
 
3. Paint the trims first and they paint the ceilings and walls.
 
4. To paint the trims, first use a sponge sander to sand the trims wipe clean and apply your first coat of paint. Allow to dry for 24 hour, then lightly sand again, vacuum, wipe clean and then apply the second coat – this will give you a nice smooth finish. Allow to dry for 24 hours then
 
5. Once the trims are dry you can tape them off using an easy release painter’s tape.
 
6. To get a nice finish on your edges and corners paint with a paint brush first and then smooth over immediately with a roller.
 
7. Wait for paint to dry for at least 24 hrs before removing painter’s tape – however, since it will form a layer that could remove some of the freshly applied paint it is best to cut along the edge using an exacto knife before removing the tape.
 
And voilà! You’ll have a beautifully painted home.

Refinishing reclaimed wood

640 425 Nisha Muire
The cost of building materials in Toronto can be very high. One of the best ways to keep your costs down while also reducing your environmental footprint is to use reclaimed wood for your home renos and projects. Reclaimed wood can come from anywhere including old pallets, decks, furniture, etc… The biggest hurdle to using reclaimed wood for your projects is preparing it so that it is viable once more. Often reclaimed wood is either damaged, waterlogged or covered in old paint. Getting it ready for a new life requires a little bit of effort but can save you a bundle.
 
Before starting be sure you have proper eye and ear protection. You might also need a respirator if using a large sander. Having access to to jointer/planer is also crucial although you can get away without one if you don’t mind imperfect lines.
 
Your first order of business will be to get rid of any metal in the wood. You’ll need to thoroughly inspect the wood for any form of metal as it can really ruin your blades if any is left behind. Be sure to remove any nails, screws, staples and even rocks that might still be embedded in the wood. If any of the pieces of wood in your reclaimed pile have problems such as cracks, loose knots or rotted sections, there is no point in restoring them unless you are planning to cut those sections away and use the remaining wood.
 
Next use your hand sander to sand every inch of the boards. If you missed any metal, the sander will likely find it for you. Lastly, cut the ends of the boards to make them even – it will help if you plan on sending them through a planner.
 
If you do use a planner, make sure to set it a just slightly larger than your boards and adjust it accordingly after that to the size you want. If you want all your boards to be the same size then you’ll have to set it to the size of your thinnest board. Usually one pass through the planner is enough, depending on the look you want. For a new look, you’ll have to send it through more than once until the desired look is achieved.
 
Be sure to use a clear stain to maintain the beautiful grain of your reclaimed wood in your finished project. If the wood will be used for a heavy use piece of furniture, then you might also consider given it a few coats of shiny varnish.

Starting the year on a DIY footing

276 183 Nisha Muire
The new year has started and all of your renovation resolutions can be achieved! Regardless of how costly contractors have become in Toronto, you can make the updates you desire to your home by putting in a little effort and elbow-grease. Naturally some renovations will require an expert to help you out – especially when it comes to plumbing and electricity, but a lot of the other work can be done by yourself. Let’s start with two of the basics.
 
Painting
Painting your Toronto home is not a difficult proposition. Although it can be an arduous task – it can go quickly if you prep the proper way and you are ready for it. The first thing to do is ready the room you which to paint. Sand the walls lightly so that the new coat of paint will better stick to the surface. Wash the walls with a damp cloth to get rid of the dust. Allow the walls to dry thoroughly. Apply painters tape along the edges that you want to protect. Throw down drop cloths and cover any furniture that you aren’t able to remove from the space. Next, start painting! Use long, vertical strokes and apply pressure evenly throughout so that you achieve uniform coverage. A good tip to keep in mind is to have several different sized paint brushes on hand from very wide to ultra thin so that you have the best control in all situations.
 
Sanding floors
If you have tired wood floors, give them a boost by sanding them and revarnishing them. The key to successfully refurbishing your wood floors is to prep them properly. You’ll need to rent a floor sander – in fact, it would be best to rent three – a drum sander, an edger and a corner sander. If the floor is in good, even condition, then you can go with the grain, otherwise you’ll have to start off going against the grain and finish off with one pass of with the grain. You will also have to start off with the roughest papers and conclude with the finest sanding paper. Remember to work in a well ventilated room and to wear protective clothing as it is a very messy and loud job. Also be sure to apply an even pressure and to hold the sanders steady in order to get a professional finish. Once the floors are sanded, sweep, dust and vacuum the floor to get rid of all dust. Wipe down with a damp cloth and then apply your chosen finish.

Toronto Housing Market Speeding Up

1024 681 Nisha Muire
Despite record property value increases in 2016, according to Re/Max’s housing outlook for 2017 Toronto area real estate prices are set to continue their steady rise. Investors can still hope to turn a profit in the hot market while buyers are going to feel the squeeze.
 
The Building and Land Development Association said this week that Toronto is facing the severest housing-drought of the last 16 years. There is a significant dearth in the supply of new build housing in the current market that looks likely to continue into 2017. The shortage of new build housing puts added pressure on the resale market, placing sellers in an enviable position while making it tougher for buyers looking for something they can afford.
 
Government policies aimed at suppressing demand have largely not worked as the result has been builders investing in fewer projects thereby placing greater demand on existing properties prices. Instead of trying to suppress demand it would be better if the government helped increase the supply of housing in order to stabilize property values.
 
Regardless of what side of the fence you are on, one thing is sure – Toronto’s hot property market is sizzling and there is money to be made if you play your cards right. However, if you are a buyer be prepared with a large down payment or be patient in order to get the house you want at the price you want. In fact, waiting until spring when the market picks up again it probably your best bet if you want a better deal than what you will find right now.

Senior-safe bathrooms

400 300 Nisha Muire
When it comes to making your Toronto bathroom safe for the senior(s) in your life, there are several steps you can take ranging from simple, quick fixes to more major updates that would require planning, time and a bigger budget. However, it is possible to create a safe and secure environment for those your love so that they can enjoy the freedom to remain in their own home for as long as possible.
 
Quick fixes
The first things to do to ensure the safety to your elderly relatives include:
– Remove all loose rugs
– Put non-skid pads or mats on the floor and in the bathtub
– Get a toilet seat adaptor that raises the seat and provides additional stability
– Add railings and grab bars on the walls and in the bath tub
– Set the water temperature to 120 degrees to prevent scalding
– Purchase a specially designed shower stool with rubber feet so that the person can sit down while showering
– Place all accessories in easy-to reach places
– Install motion sensor lighting in the bathroom
– Install night lights in all the corridors leading to the bathroom
– Change the shower head to a hand-held nozzle as they are easier to use when sitting down
 
Bigger fixes
To truly adapt a bathroom for a senior’s use there are larger renovations that can be made including:
– Removing the door locks and changing the way it is hung so that it swings outward in case of falls
– Replace the tub with a tub specially designed for those who are unable to lift their legs very high; these tubs usually have doors that open outward allowing someone to easily enter and sit down while bathing. However you can also adapt your current tub but cutting one side down to be more easily accessible.
– Replace shower doors with plastic curtains
 
Keeping your loved-one safe is possible with the above fixes.

Should you create an intergenerational space in your Toronto home

425 282 Nisha Muire
As the Canadian population ages families seeking intergenerational dwellings are becoming more common in Toronto and elsewhere in the country. As most single family homes are just that – meant for only one family, it can be a challenge finding a dwelling that can comfortably accommodate in-laws as well. However, it is possible to create your own intergenerational home. Although it will require a sizeable investment, it can be done and it can mean the difference between having to find a senior home for your elderly parents and having them retain as much of their independence as possible while having the comfort and support of knowing you close by.
 
If you do decide to add an in-law suite or a complete intergenerational section to your home, you will need the proper permits to do so. Make sure you find out what the by-laws are in your municipality for such an addition as most communities have strict rules governing what can be done. There are rules covering every aspect of building additions ranging from how the facade should look to the thickness of the insulation and sound-proofing placed between the dwellings to increase privacy.
 
The other things to keep in mind when building an in-law suite is to keep it on the main level so that elderly parents won’t have to negotiate any stairs. Be sure to include railings in all hallways, the bathrooms and even the bedroom. Be sure that cupboards and counters are all placed at comfortable reaching heights so that aching joints won’t get stressed when performing mundane, everyday tasks.
 
Some things to keep in mind when planning on either purchasing a home with an intergenerational suite or adding one to your existing home is that you will have to clearly set out house rules and boundaries for both families. Small things like whether just walking in and out of each other’s spaces is okay can cause a rift if it isn’t clearly defined early on. However, having your in-laws close by can bring immense rewards and be a source of bonding between grandparents and grandchildren.