• Real Estate Photography, Videos, Tours, Printing & Design - Toronto, GTA & Surrounding Areas

Posts By :

Nisha Muire

Bringing in the Harvest

150 150 Nisha Muire

If you are like a lot of backyard, rooftop or balcony gardeners, then you are likely seeing the real fruits of your labors right about now. After a summer’s worth of attention and care, your vegetable plants and fruit trees should be in full harvest splendour. While many plants and vines will have already been giving you produce from about mid-July, from now until mid-September is when you will really reap dividends.

One of the main difficulties faced with gardeners is what to do with your harvest when you have more than you can realistically eat? There are a few options open to you. The simplest, of course, is to give away some produce to your friends and family. However, if you have already exhausted the number of people who appreciate garden fresh veggies and fruits, then the next step is either canning or freezing. Depending on how quickly you plan on consuming your harvest will dictate the best method to follow.

Canning
Canning is the traditional method used to preserve fruits and vegetables from the garden. It is a time-consuming but thorough process that involves sterilizing of the jars/tools employed in the canning as well as the boiling and processing of the food and/or preserving liquid being used. A good overview of how to can properly can be found in the guides over here //bit.ly/1PWQbeU. Canned goods can last a for months at a time in a cool dry place without worry, as long as the canning process was done properly.

Freezing
Freezing is the quicker method of preserving food, however, it doesn’t work very well for certain items like soft fruits as the thawing process will turn them to mush. However, if you are only planning on using your fruits and berries in smoothies, pies or purées, then freezing will work fine. Generally, to get the best results from freezing vegetables such as beans, spinach or swiss chard, you should blanch them prior to freezing them. However, it is not necessary to do so. A good guide to freezing can be found here //bit.ly/1NYcCz0.

Having done both freezing and canning of my garden produce, I can say that I appreciate both methods for different reasons. I will usually can half my tomatoes and freeze the other half. The frozen tomatoes are great for recipes involving one or two tomatoes that I can throw in quickly. The canned tomatoes work best for sauces and curries. Beans, spinach and swiss chard get frozen while berries and fruits are turned into jam or compotes. Peppers are canned and taste amazing after the marinating in the pickling juice for a few weeks – they make great additions to sandwiches and pastas!

Preserving your harvest is the best way to enjoy the fresh taste of summer for months after the growing season has ended. Not only is it a fun way to spend a couple of weekends, but it will give you a real sense of satisfaction.

Choosing The Right Exterior Accents

150 150 Nisha Muire

Toronto is one of the most competitive housing markets in Canada. A homeowner looking to sell their residence will have to bring their home’s A-game to the selling-block if they want to get top-dollar for their property. Oftentimes the home’s curbside appeal will negatively impact the property’s chances of getting the best price simply because the exterior doesn’t catch the buyer’s eye as quickly as a home dressed up to sell. There are a few ways to better present your home for sale. Along with thoroughly cleaning your yard, trimming any wild trees and/or bushes, cutting the grass and planting some colourful flowers, you can also add some exterior accents to your home itself. Elements such as shutters, gable vents, mounting blocks molding and mantles all go a long way towards increasing the allure of a property and adding the right amount of flare to it create a lasting impression on all who pass by for a visit.

Shutters
Shutters used to have a function in keeping out the elements back when windows were not built as sturdily or as weather-proof as they are now. However the days of functional shutters has passed and today’s variety are used as decoration. You can get shutters in a number of materials and colours in order to best match the look and style of your home. While you can purchase shutters at your local big box renovation store, there are custom design places that can also provide a more tailored look for your residence.

Gable Vents
Gable vents are those vents you see around the edge of the roof that let air flow in and out to the roof. While there is some dissension on the utility of gable vents vs soffits, the fact remains that you can dress them up if you have them. Changing them up to be a little showier can definitely add to the appeal of your home – and again, they can easily be found at big box renovation centres or, for more unique stylings, you can consult custom exterior home accent suppliers.

Mounting Blocks
Mounting blocks are those items used to secure features such as mailboxes, address numbers, light fixtures, water faucets and electrical receptacles. While you can have very ordinary mounting blocks and although seemingly small and insignificant, spending just a little bit more to get blocks that accent your home’s features will certainly provide you with a return on your investment.

Moldings and Mantles
The kind of moldings and mantles you add to your home will probably have the greatest impact on how your dwelling looks. The trim used around your home can either blend into the background or provide pop to the structure’s features. Depending on the property’s architectural style you might want to spice things up by trying a different colour or even adding detailing such as finials, flying buttresses, keystones and sills can also really add to the ornateness of your home.

Whether you keep it simple to go all out, exterior accents can really help attract buyers to your home.

Light Up Your Life in Toronto

150 150 Nisha Muire

Exterior lighting around your home can truly enhance your property’s beauty and curb-appeal. The right lighting design will not only provide security and safety to your home, but it will also change its aesthetic once the sun goes down. It is an easy and sure-fire way to dramatically alter your home’s landscape without too much effort – although you should be prepared for the cost behind the installation of good quality lights.

The right design

Before simply going out and buying whatever exterior lights are on sale, it is good to have a lighting design to follow. If you are unsure of how to design a lighting plan for your home, you can always consult the readily available online planners such as the one found over here //bit.ly/1h2sBlx. Some key points to keep in mind when designing a lighting plan include using lighting:
to accent key features such as the facade of your home, trees, fountains & outdoor cooking areas
to provide illumination along pathways and stairs
to create an inviting ambiance that will make you want to spend time outdoors in the evenings

The right lights

Different types of lights are available and are used for different purposes. Uplights and downlights are exactly what their names imply – one shines the light upwards, the other downwards. Spotlights focuses a beam of light on a particular feature. Fairy lights are almost like Christmas lights except they can come in a variety of shapes and forms including flowers, fairies, stars, etc… Deck lighting are small lights that you can embed into your deck for a seamless finish while some designers have gone so far as to incorporate time LEDs into swimming pool designs to make it look like there are stars in the pool at night.

Aside from the type of light you choose for your design, the kind of lightbulb will also play a crucial role in how the ultimate plan will look. Most lighting designers opt for the warm look of incandescent lighting – cold, white lights are not very popular as they are less appealing. Soft, warm lighting can now be found in LEDs, which is a terrific innovation that provides gives you the same inviting look and ambiance of incandescent lighting but at a fraction of the long-term cost. While LEDs are initially more expensive upfront, they last longer and will burn for years compared with ordinary bulbs.

To hire a designer or not

If you are unsure about how to create your own lighting plan, you can always hire a lighting designer to help you out. Should you decide to hire a lighting designer be sure to certify that the person in question specializes in outdoor lighting design and installation and that their company focuses solely on exterior lighting. Also be sure to the designer listens to what you want and delivers the kind of ambiance you envision.

Regardless of how you go about installing your exterior lighting, once it is done you will enjoy the results for years to come.

Restoring An Old Deck

150 150 Nisha Muire

Your old deck might be an eyesore now, but it doesn’t have to be! With just a little bit of elbow grease and minimal investment you can have it looking as good as new in a very short time.

Restoring an old deck is not as difficult as it might seem. It only requires a good cleaning, the replacement or fixing or rotten boards and the staining or painting of the structure to keep it going for another few years

Step One
The first thing you have to do when undertaking the restoration of your old deck is to check for structural damage. The spots to focus on are places where the deck touches the ground. If you can sink the tip of your screwdriver easily into posts or joints, then your deck’s foundation is no longer solid and you will be looking at a major overhaul. However, if the structural elements of your deck are still in good shape, then you are good to go.

Step Two
Replace or repair any rotten or loose deck boards. If your deck board has small knots or is splintering you might be able to reinforce it with exterior wood putty – as long as the damage is not significant. However, the better route would be to replace the board entirely. Removing old deck boards can be done with two hammers (if the boards were secured with nails) or with a reversible drill if secured with screws. The two hammer technique is very effective – just plae the hook side of hammer one against the nail head and hammer the hammer down until the nail is firmly wedged between the hooks – then use the hammer like a crowbar to pry the nail free.

Step Three
Cleaning. Although decks are supposed to be cleaned every year, most homeowners don’t realize this. If a deck is cleaned every year, then you can get away with a simple cleanse before moving to the next step. However, if you haven’t really washed your deck in a while, then you should get a good product such as Thompson’s Deck Wash. You simply mix it in a bucket and apply it to the surface of your deck with a good stiff-bristled brush so that you can really scrub at it. You can also use a pressure washer for really tough stains – but be careful not to put it on the highest settings, which can damage your deck boards.

Step Four
Allow your deck to dry COMPLETELY before applying any kind of stain. You should wait a good 24 hours so that your deck is absolutely dry before staining. However, if it rains before you stain, you have to wait longer.

Step Five
Most contractors recommend a semi-transparent stain for old decks as the grain can still show through but the pigment will make the new boards blend in better with the old boards. However, there are also dark stains and paint options that provide startlingly beautiful results. Read the instructions on whatever stain you use for proper application techniques.

Step Six
Wait until the stain/paint dries – and enjoy your restored deck!

Toronto Backyard Oasis

150 150 Nisha Muire

Backyards are no longer considered just a patch of land for growing grass and putting out a couple of lawn chairs. Backyard designs have evolved to turn these private spaces into personal havens of enchantment and escape. With just a little bit of imagination you can transform your yard into a resort-like retreat for enjoying year-round.

There are a few elements to incorporate into a backyard design that will take it from ordinary to extraordinary.

Texture

Using materials such as wood and stone in your design for patios and decks will add a nice natural look and feel to your creation. The materials blend beautifully into the surroundings and don’t look out of place. However, if you choose to use concrete or composite materials for patios and decking, there are ways of incorporating them without having them stand out too much. A good plan will help you blend these materials into your overall concept for a more seamless look and feel.

Water

Nothing is more soothing that the sight and sound of water rippling. Whether you have space for a large pond or swimming pool, or just enough space for a fountain, having some sort of water feature will go a long way towards creating a relaxing yard.

A touch of Romance

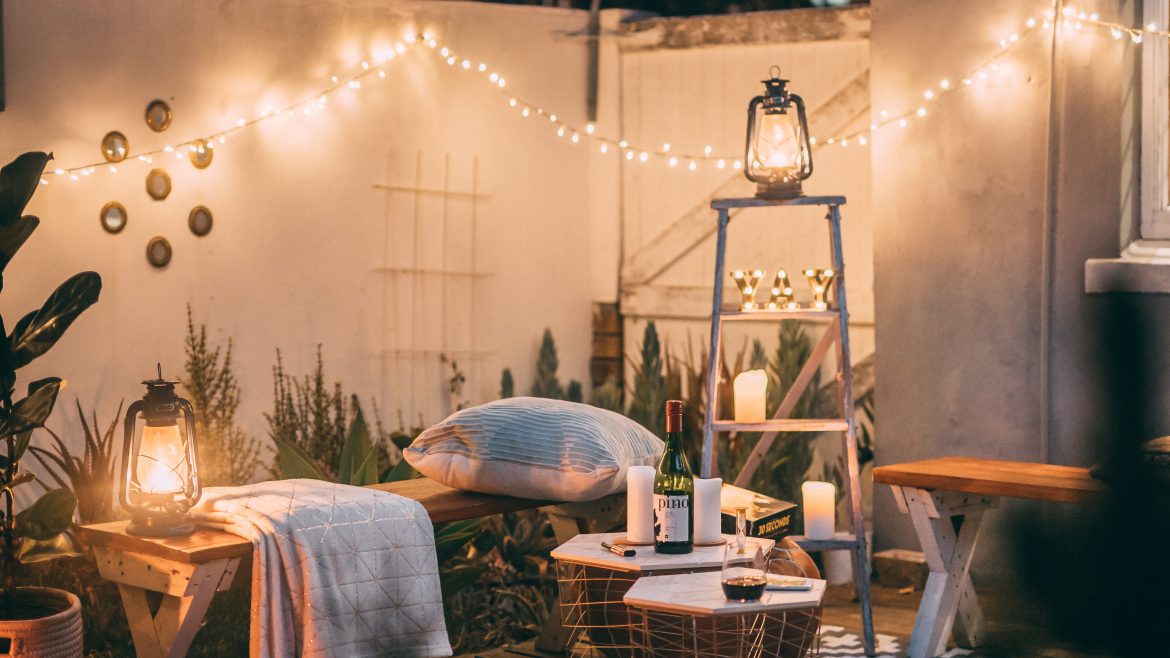
Whether through the use of candles, lanterns or fairy lights, adding a touch of romance to your yard will soften the environs and make it even more inviting for family and guests – especially in the evenings after the sun has set.

Privacy

No one can fully relax if they feel their neighbours staring down at them from beyond their fence. To ensure privacy, a good fence is necessary. Although wood slats is the standards, planting some tall evergreen or even some seasonal shrubbery to further close any gaps is a good idea. Not only will it create a sense of isolation from the world around you, but greenery will also contribute to your sense of being ensconced in nature or at your own private get-away.

Seating

If at all possible, create several different seating areas – one for dining with a larger group, one for sitting alone and contemplating life, one for a discreet tête-à-tête – and whatever you do, make sure that the seating is comfy and inviting!

Fire

What’s a backyard without a fire pit? Ideal for roasting marshmallows, sitting around and talking or keeping you warm on a chilly night, a fire pit is a terrific idea for adding a fun element to your overall design.

Flowers

Landscaping plays an integral role in what your backyard design will ultimately look like. If you are not savvy with flowers and plants, then get input from your local horticulturist to find out what plants best suit your needs. A mix of annuals and perennials is the best way to go so that you have your foundation plants and your splashes of colour all year round.

pic by Taryn Elliot

Outdoor Living Spaces

683 1024 Nisha Muire
Outdoor living spaces in Toronto have become de rigeur. Everyone and anyone has realized the vast potential and real enjoyment quotient inherent in using their backyard as an extension of their regular living quarters. Not only does extending your living to the outdoors mean that you are creating an even larger space for hosting summertime events, but you are making it a place that you want to use. Forget about the plastic garden chairs and sprinklers of your youth, today’s backyards have taken on a life of their own.

Although you might think that you need a large backyard or lots of land to create an outdoor living space, this is far from true. All you need is a bit of imagination and the willingness to see beyond what’s already there. Even if you live in a condo with nothing more than a balcony or a rooftop terrace as outdoor space, there are ways to transform what you have into something magical.
 

Balconies

Even the tiniest of balconies can be a refuge from the world. Great ideas include adding some kind of flooring whether it be as simple as a throw-rug or even some easy-to-assemble wood tiles, laying a floor covering can change the look of your balcony. Adding a couple of potted plants or flower boxes will also create the illusion of a garden regardless of where you are. Another fun element that will bring your balcony to life are light features such as lanterns, candles or torches. Here is a good list of fun ideas to brighten your balcony //bit.ly/1HVxBi0.
 

Decks/Patios

Decks are any raised surface attached to or near your home. They can be made from wood, composite materials or concrete. Patios are laid directly on the ground and are generally made from stone although they can also be made of wood or concrete. Both structures are ideal for creating an outdoor living room as often they are attached to the home and are easily accessible. Adding a pergola, an awning (if attached to the home) or a gazebo are great ideas as they provide shelter from the elements and can create a very cozy atmosphere. If your deck or patio is large enough, you can create sections by using different design elements including the creation of a bar, using tall planters to create divisions or by placing furniture strategically.

Again here, using some form of ground covering can also help to create divisions on your deck or patio and can add a splash of colour or enhance your overall design while a great lighting plan will also go a long way to creating the perfect mood.
 

Luxe Accessories

The real key to creating an outdoor living room or kitchen is to have luxurious patio accessories. Whether you hunt for treasures that you can restore to use in your design or whether you buy your favorites items, choosing the right fabrics, textures and colours will go a long way towards making your outdoor space inviting. A good link to some interesting ideas can be found over here //bit.ly/1g8ht5X.

Pool Time in Toronto!

150 150 Nisha Muire

It’s summertime in Toronto and pool season is open! There’s nothing like a crystal pool of clear and refreshing water to take the edge off those 30-degree days. Whether you want to simply soak for a bit, party, play or exercise, pools are the ultimate backyard boost for those water-babies who love the aqua.

When it comes to choosing the kind of pool to install in your backyard, there are several things to consider – do you want an above-ground or inground version? Will it be vinyl, concrete, gunite or fiberglass? Will it be have a graded depth? Will it be chlorinated or salinated? What will be the surrounding surface? Although your pool company will definitely be able to help you make the best decision for your property, your needs and, above all, your budget, it is good to have an idea of what is available.

Cost
Above-ground pools are are the most affordable of the options listed running anywhere between four to seven thousand dollars while a realistic budget for in-ground pools will be between thirty to seventy thousand. Don’t believe too-good-to-be-true deals for in-ground pools listing them at below fifteen thousand dollars – that price certainly doesn’t include the installation, the liner, the surrounding surface, the landscaping or the accessories such as heaters, covers, etc…

Materials & Longevity
Vinyl refers to the liners used in both above-ground and in-ground pools. In an above-ground pool they usually have to be replaced in about 5 years while they have a slightly longer life in in-ground pools with an average replacement rate after 6 years. Concrete pools are very sturdy and last the longest but will need to be resurfaced every 9-13 years. Gunite is a form of concrete that is also very popular for pools and also lasts a very long time. Fiberglass pools will last around 20 years or longer depending on use and how well it is maintained.

Chlorine or Salt?
Many people are opting for salt instead of chlorine pools now-a-days. Although the salt is actually a naturally chlorine producing variant, it is not as harsh on eyes and skin as regular chlorine. It is also easier to store than chlorine but can damage plumbing and fixtures if not maintained properly.

Surround
The surface surrounding your pool will depend on your overall landscape design. Typically people choose stone or concrete patios for in-ground pools and wood decks for above-ground pools. However, the choice you make will be in-line with your home’s aesthetics and also your budget.

Decks vs Patios

150 150 Nisha Muire

Decks and patios are now key features looked for by homebuyers when on the hunt for a new home. With the creation of the “outdoor living space” these structures have almost become a necessity. As a homeowner wondering whether to install a deck or a patio, there are a few items to keep in mind. First, whatever you install should not break your bank account. Second, it should suit your yard. Third, it should suit your needs.

Before we take a look at the differences between decks and patios, however, let’s clearly define what they are. Although many people use the two words interchangeably, a deck is a supported structure usually made out of wood, vinyl or concrete while a patio is laid directly on the ground and is typically made from stone, pavers, poured concrete, gravel or, sometimes, mulch.

Cost
The cost of installing a deck can run anywhere from $6,000 to $20,000 depending on the size and intricacy of your deck as well as the material you use. Composite decking is far more expensive per square foot than regular treated wood, while cedar planking comes in at the midrange of the two. A good cost calculator for decks can be found here //bit.ly/1Cpn7uw.

Patios are far more affordable than decks. Pavers can be as little as $0.50 but can go as high as $30 although you do have to take into consideration the cost of leveling the ground and adding enough crushed stone to make a stable base. If you plan on doing the work yourself, then a patio can run you as little as $200 or can go as high as $10,000 depending on the size and scope of your design. A good calculator can for patios can be found here //bit.ly/1HOrYFL.

Suitability
Choosing the material that best suits your yard and your needs are also two very important considerations. If you have a sloping yard, then you will have to level the ground before installing a patio, whereas installing a deck will make leveling the surface much easier. However, if you want to incorporate your sitting area into your landscaping, it is easier to do so with patios, which can be surrounded by gardens and vegetation.

What you need is another factor that will influence your decision. If you want a spotlight place overlooking a view, then a deck is definitely the way to go. However, if you want a cozy spot for seeking shade and tranquility or for installing a fire pit, then a patio surrounded by lush gardens is probably a better idea. Many landscape designs will, in fact, incorporate both a deck and a patio in the same design to better serve different needs.

Regardless of whether you go with a deck or a patio, the options for both are endless and the results, if done well, can serve your family and home for years to come.

Toronto Perennials vs Annuals

150 150 Nisha Muire

The eternal question when planning a garden is whether to include perennials or annuals in your design. The right answer is somewhere in the middle as both varieties of plants are used for different purposes.

Perennials
Perennials are plants that return every year, require little maintenance and will produce attractive, fragrant flowers – but for only for a specific time during the growing season. If you opt to only grow perennials, the trick is to select varieties that have staggered blooming times so that you always have colour in your garden. Otherwise, you will have one glorious burst of colour from all of your plants at once and then have only their green leaves for company the rest of the summer.

Perennials are ideal for xeriscapes and for large gardens as they provide a consistent backdrop against which to plant other flowers.

Annuals
Annuals are plants that flower for only one season and then die. They are grown from seed, produce really bright, attractive blooms and then seed. The beauty of annuals is that they will flower for the entire growing season giving you masses of lovely flowers for the entire summer. The drawback with annuals is that you have to plant them every year, which is costlier and more time-consuming than only having perennials in your garden.

Annuals are ideal for mixed borders, planters and areas of high visibility where you want a lot of show.

Ideally speaking…
The ideal situation for any garden is to have a mix of annuals and perennials. The perennials should form the backbone of your garden that is then complemented by the annuals that you include in your design. Matching the annuals to your perennials in terms of colour and texture will produce a truly attractive garden that will provide colour and spectacle throughout the summer.

A good mix of both annuals and perennials will also ensure that you are not stuck having to replant your entire garden every year.

Choosing the plants to include in your landscape is probably one of the more pleasing aspect of gardening. Watching them grow, flower and reproduce can provide years of enjoyment to any homeowner – even those who leave the gardening to others.

Toronto Xeriscaping

150 150 Nisha Muire

Xeriscaping the grounds of your Toronto home may not seem like a necessity given our relative abundance of water, however, it is a trend that has been gathering steam over the past few years. Xeriscaping is landscaping to reduce irrigation and water usage. Although commonly believed to only include plants that are associated with dry climates or desert-scapes, Xeriscaping essentially involves the use of plants native to a particular climate to better sustain their ability to grow without the additional use of water. There are seven principles when it comes to Xeriscaping.

Planning and Design
The first thing you must determine before digging your flower beds or buying any plants is the overall plan that you want for your yard. It involves determining where the sun shines strongest, the parts that are in shade, the high-traffic areas, whether you want some hard elements (ie: decks, patios) in your design, etc… Remember that shaded areas will retain water better and also reduce the temperature of your garden.

Soil Analysis and Improvement
An analysis of your soil includes both a visual and chemical analysis. Determining the composition of your soil will help you to better prepare your beds for planting. It will also determine the kind of plants you should choose for different areas of your garden as rarely is there only one type of soil found in a yard.

Plant Selection
When it comes to choosing plants for your xeriscape, it’s important to select varieties that are compatible with your soil, environment and design. The right plants will flourish and provide yearly beauty without much effort and with little maintenance.

Use of Turf
Turf is used as an effective ground cover as it retains moisture, lowers surface temperature and provides a good underpadding for feet. However, it does require additional irrigation and does need to be mown so maintenance requirements are higher. The way around these two problems is to reduce the areas of turf in your design and to choose varieties of turf that require less water and less mowing.

Irrigation
As the key to any xeriscape is to reduce the amount of water your garden requires it is important to select a design and the plants that most efficiently use existing water, such as rainfall. While some designs and plants will require occasional irrigation, the overall goal is to minimize this need.

Mulches
Using mulches in a xeriscape is very important. Aside from its decorative quality, it helps to retain moisture in the soil, which in turn helps roots grow longer and stronger. There are different varieties of mulch including stone mulches, but the best kind are the organic materials as they are less heat absorbent and allow for better airflow to the roots.

Maintenance
The idea behind xeriscaping is to reduce the amount of maintenance a landscape requires. The best way to do this is to discourage new growth, which requires a lot of irrigation. A good way to discourage new growth is to not fertilize as often, to reduce pruning to very light maintenance and to only cut turf when one third of the leaf will be removed. Ensuring that weeds are removed is also important as weeds compete for water in a garden.

Xeriscaping is an effective way of creating low-maintenance and beautiful landscapes that will flourish for years to come.